一个策略游戏中最重要的部分就是它的地图,地图包含游戏中重要的战略信息,玩家的几乎所有操作都需要与地图的交互进行。而且,身为策略游戏玩家,表现效果丰富的策略地图,也能很好地满足大家指点江山、统筹全局(机枪往前移五米)的愿望。
以下举例一些策略游戏内的地图
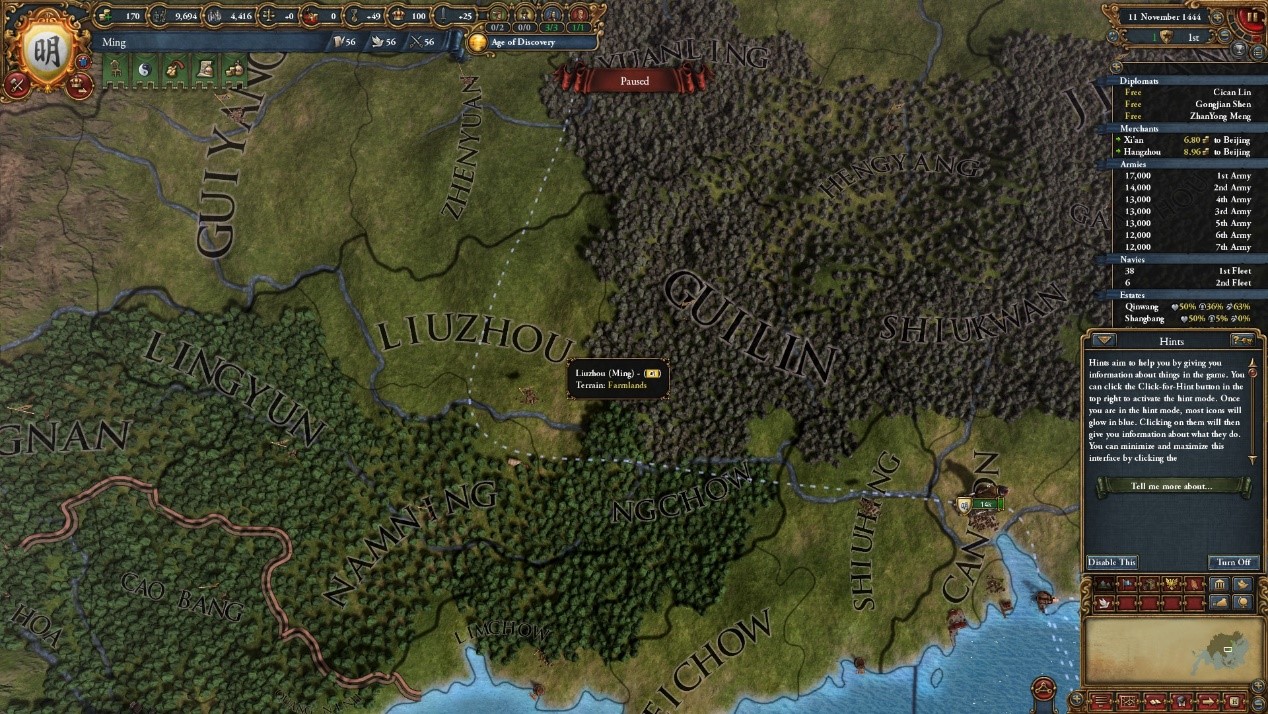
图:《欧陆风云4》游戏地图
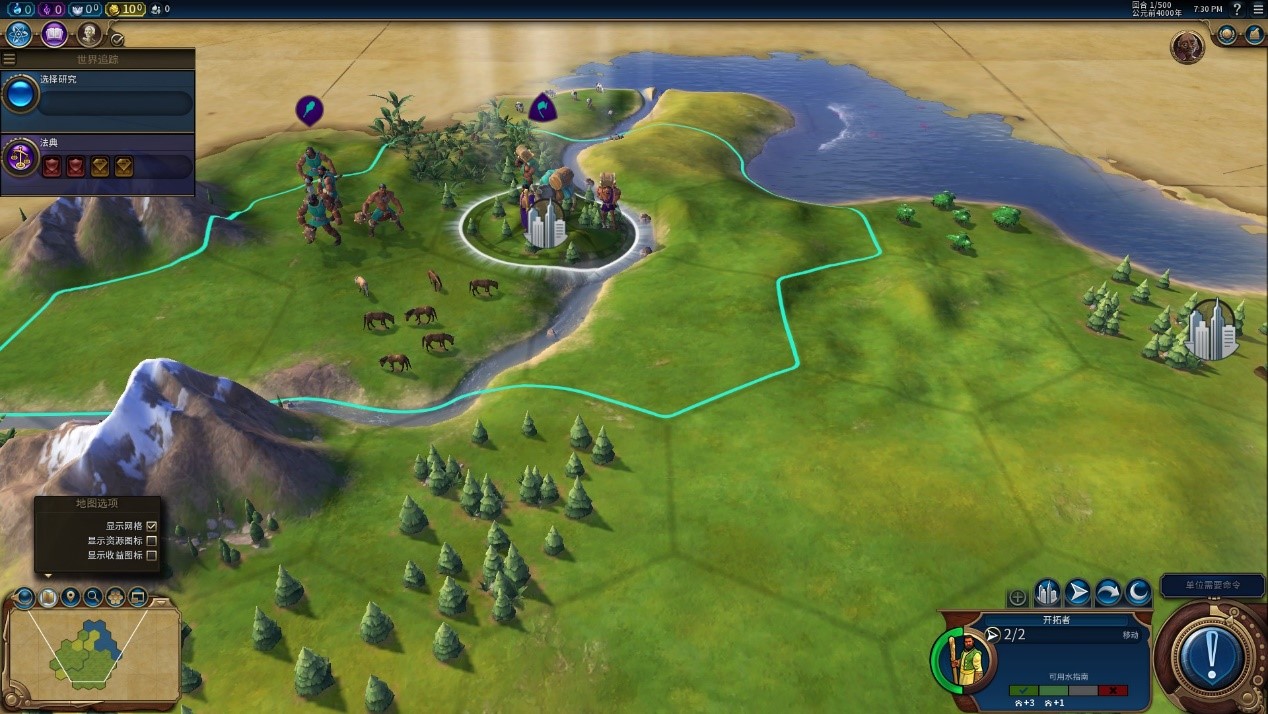
图:《文明6》游戏地图
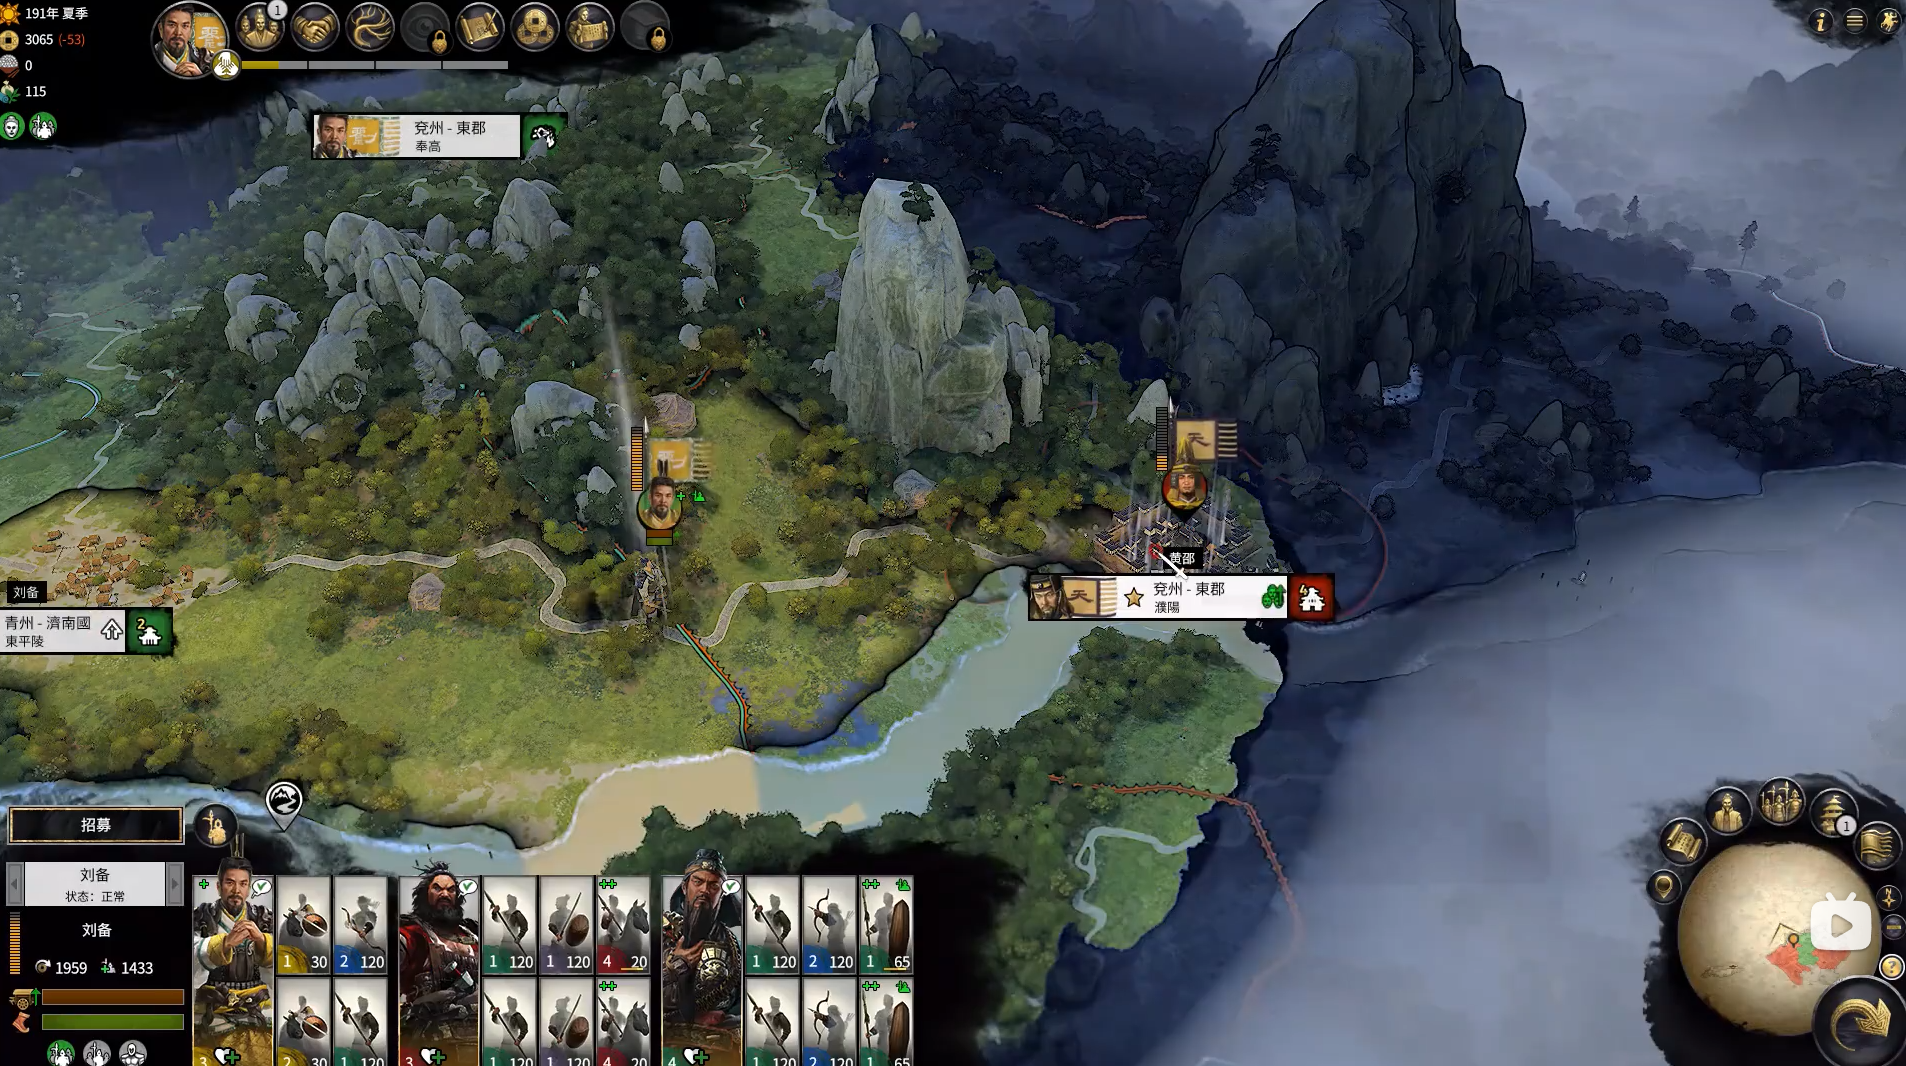
图:《全战三国》游戏地图
本系列的开发日志,记录本人制作一个适用于策略游戏开发的地图包,最终目的是开发一个即插即用的地图包,适用于实现策略游戏的地图构建。
1.编辑器界面搭建 在开始我们的地图开发之前,需要先做一些基建上的准备,比如编辑器。
众所周知,Editor内的工作是面向开发人员的,更要求易用性,同时因为并非GamePlay向,对性能效率的要求往往会低些(可以堆垃圾代码了)。如果你认为直接在Runtime下生成地图内容更方便,也可以跳过本节。但考虑到地图开发是一个很漫长的过程,Editor的辅助也是很重要的,毕竟可视化界面一直是最直观的。https://assetstore.unity.com/packages/tools/utilities/odin-inspector-and-serializer-89041
以下对编辑器做个简单的封装。
1 2 3 4 5 public class RootMapEditor : OdinMenuEditorWindow {}
建立编辑器的入口,之后可以在Unity内上方的ToolBar部分的GameMap项打开
1 2 3 4 5 6 [MenuItem("GameMap/OpenMapEditor" ) ] private static void OpenMapEditor () RootMapEditor window = GetWindow<RootMapEditor>("MapEditor" ); window.minSize = new Vector2(720 , 320 ); window.Show(); }
做完上面的操作后,通过GameMap-OpenMapEditor打开的编辑器是一片空白,只有外壳,需要再加上各种子页面。
所以我们添加一个子页面的基类:
1
2
3
public abstract class BaseMapEditor : ScriptableObject {}
之后的开发中继承实现该类即可添加子页面内容,例如:
1
2
3
4
5
6
7
public class TerrainEditor : BaseMapEditor {} public class HeightMapEditor : BaseMapEditor {} public class LandformEditor : BaseMapEditor {}
同时添加用于初始化地图编辑器的方法,在这个方法中创建各种子页面,并且加入到顶部索引,现在需要通过顶部的GameMap – InitMapEditor来初始化编辑器配置,再打开。(下方代码中的各种文件路径需要自行替换)
1 2 3 4 5 6 7 8 9 10 11 12 13 14 15 16 17 18 19 20 21 22 23 24 25 26 27 28 29 30 31 [MenuItem("GameMap/InitMapEditor" ) ] private static void InitMapEditor () if (!AssetDatabase.IsValidFolder(MapStoreEnum.WarGameMapRootPath)) { string folderName = AssetsUtility.GetInstance().GetFolderFromPath(MapStoreEnum.WarGameMapRootPath); AssetDatabase.CreateFolder(MapStoreEnum.WarGameMapRootPath, folderName); Debug.Log(string .Format("create file folder : {0}" , MapStoreEnum.MapWindowPath)); } string terrainPath = MapStoreEnum.MapWindowPath + "/" + MapEditorClass.TerrainClass; if (!AssetDatabase.IsValidFolder(terrainPath)) { AssetDatabase.CreateFolder(MapStoreEnum.MapWindowPath, MapEditorClass.TerrainClass); } HashSet<string > terrainFileNames = GetFileNames(terrainPath); if (!terrainFileNames.Contains(MapEditorEnum.TerrainEditor)) { CreateWindowObj<TerrainEditor>(MapEditorClass.TerrainClass); } if (!terrainFileNames.Contains(MapEditorEnum.LandformEditor)) { CreateWindowObj<LandformEditor>(MapEditorClass.TerrainClass); } if (!terrainFileNames.Contains(MapEditorEnum.HeightMapEditor)) { CreateWindowObj<HeightMapEditor>(MapEditorClass.TerrainClass); } if (!terrainFileNames.Contains(MapEditorEnum.HexMapEditor)) { CreateWindowObj<HexmapEditor>(MapEditorClass.TerrainClass); } AssetDatabase.SaveAssets(); AssetDatabase.Refresh(); Debug.Log("成功初始化 MapEditor, 现在可以打开编辑器!" ); }
两个辅助方法,用于获取完整的文件名称、创建子页面物体:
1
2
3
4
5
6
7
8
9
10
11
12
13
14
15
16
17
18
19
static HashSet<string > GetFileNames (string folderPath string [] guids = AssetDatabase.FindAssets("" , new [] { folderPath }); HashSet<string > terrainFileNames = new HashSet<string >(); foreach (var guid in guids) { string path = AssetDatabase.GUIDToAssetPath(guid); string fileName = System.IO.Path.GetFileNameWithoutExtension(path); terrainFileNames.Add(fileName); } return terrainFileNames; } static void CreateWindowObj <MapEditor >(string windowClasswhere MapEditor : BaseMapEditor string rootWindowPath = MapStoreEnum.MapWindowPath + "/" + windowClass + "/" ; MapEditor asset = ScriptableObject.CreateInstance<MapEditor>(); asset.name = asset.EditorName + ".asset" ; string path = rootWindowPath + asset.name; Debug.Log("create path: " + path); AssetDatabase.CreateAsset(asset, path); }
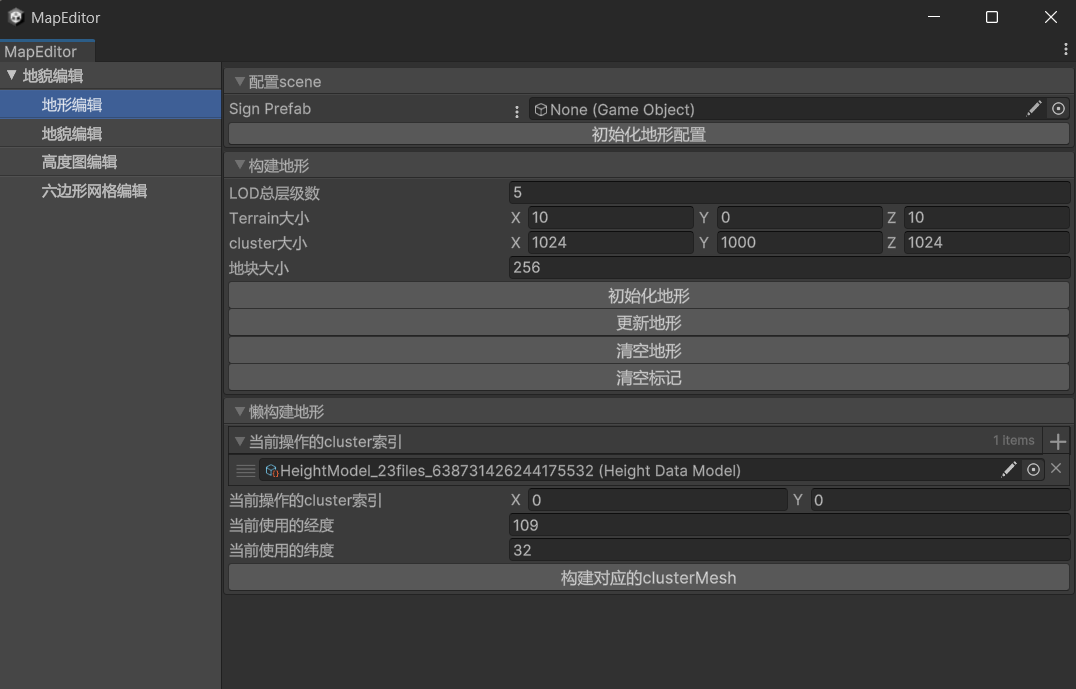
添加上各种功能后的编辑器效果,如下图所示(下图是填充了部分内容的,如果你没有在Window内添加内容,那么依然会显示一片空白)。
图:填充内容后的MapEditor
看起来还挺完整的,那么第一步就成功迈出了
如果你依然对Odin编辑器的其他部分感兴趣,可以看看以下的教程/文档:https://github.com/su9257/Odin-Inspector-Chinese-Tutorial https://odininspector.com/documentation
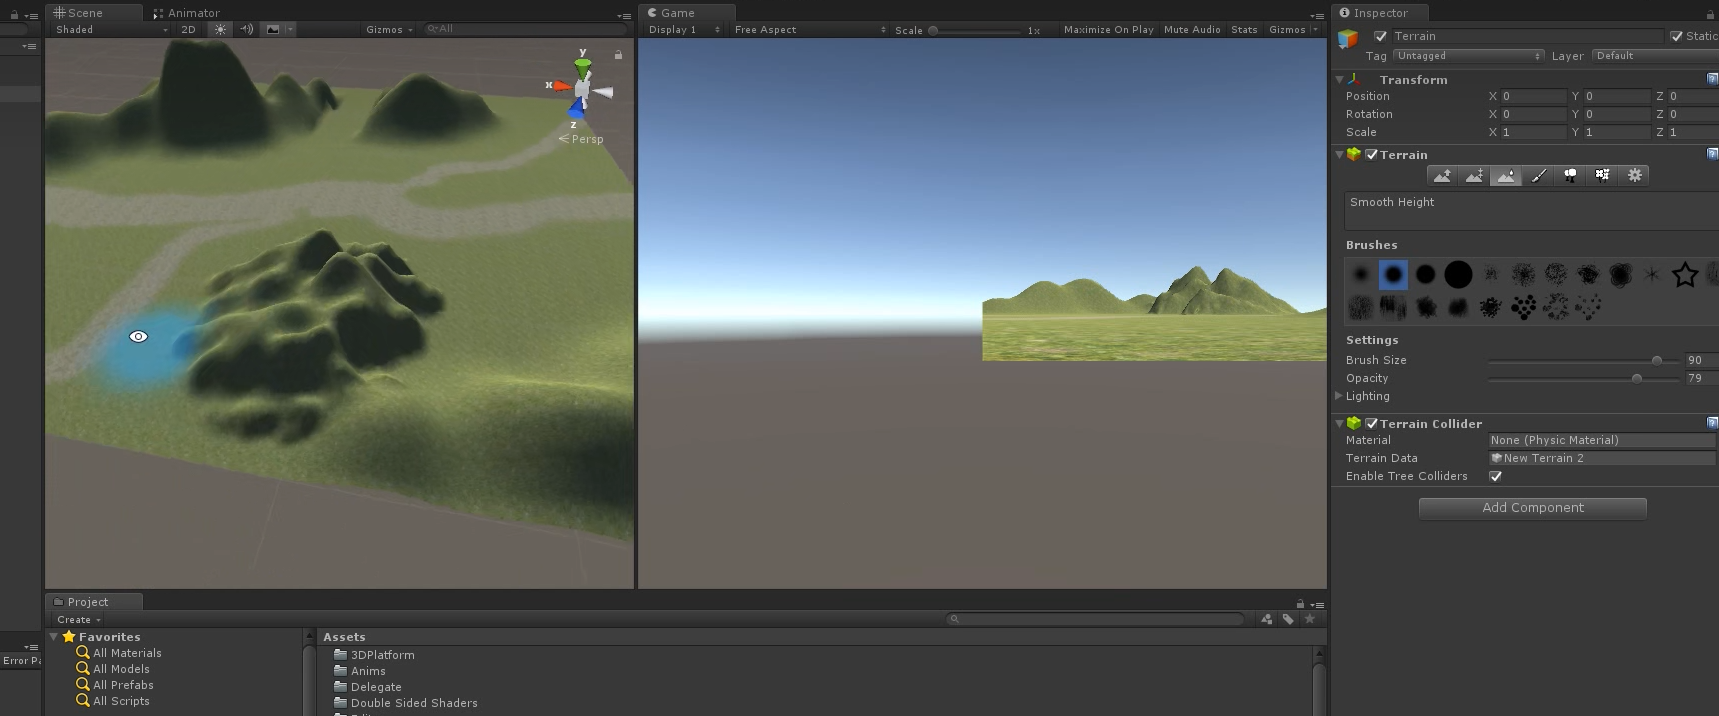
2.Terrain数据组织 在Unity中有内置的Terrain系统,它是Unity官方提供的一套地形系统,可以直接在Inspector中刷地形。支持URP和HDRP,源码在C++层中,意味着个人开发者无法定制Terrain的细节。与Mesh的渲染不同,Terrain新开了一个Pass去处理,做了很多优化与适配。Terrain在移动端的性能表现并不好,在移动端制作地形依然偏向使用Mesh的方案,Mesh是适用性更广的工作流,突出一个思想简单,所以此处会使用Mesh实现地形。
图:使用Unity内置的Terrain系统
2.1.地块分块处理 2.1.1.为什么要分块 在大地图游戏中,对地图的分块处理是基操。在超大规模的地图里,通常将地图数据分为一个个Chunk,根据玩家的位置加载周围的Chunk。对地图分块,利于我们进行动态加载、剔除等操作,实现内存等方面的优化,更好管理地图数据。
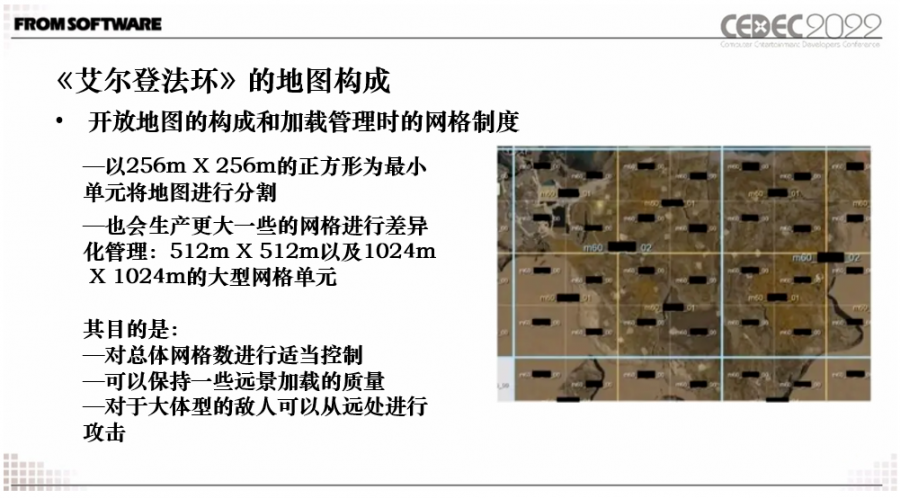
以《艾尔登法环》为例,法环的地图总面积约为100平方千米,游戏中划分的最小网格单元为256m×256m,也会有更大一些的比如1024m×1024m的网格划分,这样可以对游戏内地图的总体网格数进行适当性的控制,同时保持远景的加载质量。
图:《艾尔登法环》在2022年GDC中的汇报
而在策略游戏中,因为策略游戏一般是2.5D制作,地图往往是平面的,相比法环之类的大制作,在地图上考虑的东西要更少些,比如不需要考虑纵深结构。
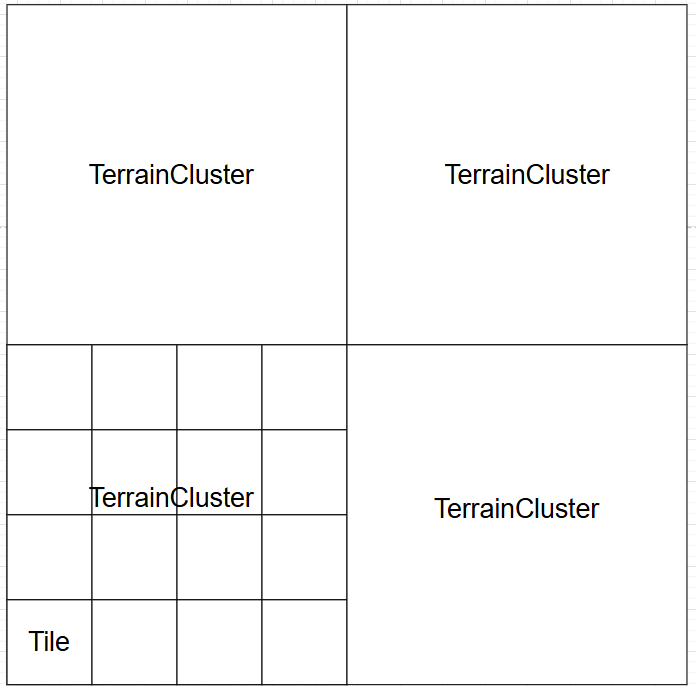
我们在此简单地将地图块,划分成两层:世界地形会由多个Cluster组成,一个Cluster内置多个Tile,如下图所示:
图:地形分块的简单模型
2.1.2.地块分块模型 在此简单阐述下地图模块中Terrain的分块模型:
以下是两个地块单位的关键部分代码(注:以下关于LOD的字段可以先添加,后续建LOD的时候再使用):
1
2
3
4
5
6
7
8
9
10
11
12
13
14
15
16
17
18
19
20
21
22
public class TerrainCluster { public int idxX { get ; private set ; } public int idxY { get ; private set ; } public int longitude { get ; private set ; } public int latitude { get ; private set ; } Vector3Int terrainClusterSize; int tileSize; TDList<TerrainTile> terrainTileList; } public class TerrainTile { public int tileIdxX { get ; private set ; } public int tileIdxY { get ; private set ; } public int longitude { get ; private set ; } public int latitude { get ; private set ; } public int curLODLevel { get ; private set ; } Vector3 clusterStartPoint; int tileSize; int [] LODLevels; MeshData[] LODMeshes; public Vector3 tileCenterPos { get ; private set ; } private MeshFilter meshFilter; }
2.2.建立地块类 在完成上述的地块数据建模之后,我们可以开始构建地形Mesh了,下面代码用于建立TerrainCluster,缺失的字段直接补充即可
注:以下代码是较早的版本,查看最新版本代码请到:https://github.com/huayuxingtguiyujing/WarGameMap
注:建议直接跳过本节的TerrainCluster与TerrainTile构建,到下一节的地形Mesh构建
1
2
3
4
5
6
7
8
9
10
11
12
13
14
15
public void InitHeightCons (Vector3Int terrainSize, Vector3Int clusterSize, int tileSize, int LODLevel, List<HeightDataModel> heightDataModels ) this .terrainSize = terrainSize; this .clusterSize = clusterSize; this .tileSize = tileSize; this .LODLevel = LODLevel; clusterWidth = terrainSize.x; clusterHeight = terrainSize.z; clusterList = new TDList<TerrainCluster>(clusterWidth, clusterHeight); for (int i = 0 ; i < clusterHeight; i++) { for (int j = 0 ; j < clusterWidth; j++) { GameObject clusterGo = CreateHeightCluster(i, j); clusterList[i, j].InitTerrainCluster(……); } } }
上面的代码中,创建地形Mesh数据会分配大量内存,如果地形过大可能会炸,同时因为过程是同步的,如果创建的地块数量太多,会卡很久。所以这里建议使用懒初始化去构建地形,方法很简单,在需要这块地块的时候再创建地块的Mesh即可,此处暂时不记。
TerrainCluster中的InitTerrainCluster初始化方法:
1
2
3
4
5
6
7
8
9
10
11
12
13
14
15
16
17
18
19
20
21
22
23
24
25
26
27
28
29
30
31
public void InitTerrainCluster (int idxX, int idxY, int longitude, int latitude, Vector3Int terrainClusterSize, int tileSize, int LODLevel, GameObject clusterGo this .idxX = idxX; this .idxY = idxY; this .longitude = longitude; this .latitude = latitude; this .terrainClusterSize = terrainClusterSize; this .tileSize = tileSize; this .LODLevel = LODLevel; this .clusterGo = clusterGo; Vector3 startPoint = new Vector3(terrainClusterSize.x * idxX, 0 , terrainClusterSize.z * idxY); InitTerrainCluster(startPoint); } private void InitTerrainCluster (Vector3 clusterStartPoint ) int tileNumPerLine = terrainClusterSize.x / tileSize; terrainTileList = new TDList<TerrainTile>(tileNumPerLine, tileNumPerLine); for (int i = 0 ; i < tileNumPerLine; i++) { for (int j = 0 ; j < tileNumPerLine; j++) { MeshFilter meshFilter = CreateHeightTile(i, j); terrainTileList[i, j].InitTileMeshData(i, j, longitude, latitude, clusterStartPoint, meshFilter, lodLevels); } } int vertexNumFix = (int )Mathf.Pow(2 , LODLevel ); for (int i = 0 ; i < tileNumPerLine; i++) { for (int j = 0 ; j < tileNumPerLine; j++) { terrainTileList[i, j]. InitTerrainTile( tileSize, vertexNumFix, terrainClusterSize); } } curLODLevel--; }
CreateHeightTile:用于创建一个游戏物体,代表一个Cluster,可以放置Mesh渲染组件,获取到MeshFilter作为Cluster的字段
1
2
3
4
5
6
7
8
private MeshFilter CreateHeightTile (int idxX, int idxY GameObject tileGo = new GameObject(); tileGo.transform.parent = clusterGo.transform; tileGo.name = string .Format("heightTile_{0}_{1}" , idxX, idxY); MeshFilter meshFilter = tileGo.AddComponent<MeshFilter>(); tileGo.AddComponent<MeshRenderer>(); return meshFilter; }
TerrainTile中的InitTileMeshData初始化方法:
1
2
3
4
5
6
7
8
9
10
11
public void InitTileMeshData (int idxX, int idxY, int longitude, int latitude, Vector3 startPoint, MeshFilter meshFilter,int [] lODLevels this .clusterStartPoint = startPoint; this .meshFilter = meshFilter; tileIdxX = idxX; tileIdxY = idxY; this .longitude = longitude; this .latitude = latitude; curLODLevel = -1 ; LODLevels = lODLevels; LODMeshes = new MeshData[lODLevels.Length]; }
2.3.地形Mesh构建 2.3.1.MeshData数据类 最后是关键的构建Mesh的部分代码,我们为地形Tile专门写一个Mesh数据类,以下是它需要包含的字段
1
2
3
4
5
6
7
8
9
10
11
12
class MeshData { Vector3[] vertexs = new Vector3[1 ]; Vector3[] fixedVertexs = new Vector3[1 ]; Vector3[] outofMeshVertexs = new Vector3[1 ]; Vector3[] fixedOutMeshVertexs = new Vector3[1 ]; int [,] vertexIndiceMap = new int [1 , 1 ]; Vector3[] normals = new Vector3[1 ]; Vector2[] uvs = new Vector2[1 ]; Color[] colors = new Color[1 ]; int [] triangles = new int [1 ]; int [] outOfMeshTriangles = new int [1 ]; }
构建一个Mesh最基本的要素就是:
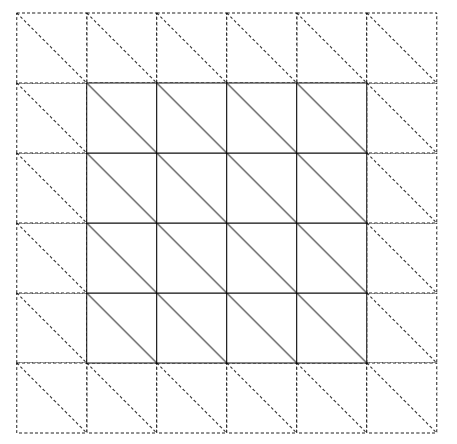
所以MeshData包含了上述字段,而值得注意的是这里使用了outofMeshVertexs数组来记录地形Mesh外的数据,这是因为每个地块边缘的顶点都需要额外地计算外面一层的片元,否则边缘顶点的法线计算会出现问题(因为只计算了本地块的三角型对法线的贡献),不同地块的的衔接处会出现明显的界限。
如下图所示,边缘虚线的顶点存储在outofMeshVertex中,不会用于构建Tile地块,也会存储额外的边缘三角型信息
图:存储额外的顶点用于构建Mesh
2.3.2.添加顶点 往MeshData中添加顶点和片元索引的方法。会根据一个外部的传入参数vertexIndex来决定要添加的顶点是Tile内的,还是在OutofMesh的,外部参数在后面的构建Mesh部分可见。三角型片元一样需要判断该片元是内部的还是外部的
此处参考了一个开源的游戏地形构建方案,可以结合此链接学习:https://github.com/SebLague/Procedural-Landmass-Generation
1
2
3
4
5
6
7
8
9
10
11
12
13
14
15
16
17
18
19
20
21
22
23
24
25
26
27
public void AddVertex (Vector3 vertexPosition, Vector2 uv, int vertIndex ) if (vertIndex < 0 ) { outofMeshVertexs[- vertIndex - 1 ] = vertexPosition; } else { vertexs[vertIndex] = vertexPosition; uvs[vertIndex] = uv; normals[vertIndex] = new Vector3(0 , 1 , 0 ); colors[vertIndex] = GetColorByHeight(vertexPosition.y); } } public void AddTriangle (int a, int b, int c, int i = 0 , int j = 0 if (a < 0 || b < 0 || c < 0 ) { if (outOfMeshTriangleIndex + 1 > outOfMeshTriangles.Length - 1 ) { Debug.LogError(string .Format("triangle idx : {0}, {1} !" , i, j)); Debug.LogError(string .Format("out of bound! cur idx : {0}, cur a : {1}, cur b : {2}, cur c : {3}, length : {4}" , outOfMeshTriangleIndex, a, b, c, outOfMeshTriangles.Length)); } outOfMeshTriangles[outOfMeshTriangleIndex] = a; outOfMeshTriangles[outOfMeshTriangleIndex + 1 ] = b; outOfMeshTriangles[outOfMeshTriangleIndex + 2 ] = c; outOfMeshTriangleIndex += 3 ; } else { triangles[triangleIndex] = a; triangles[triangleIndex + 1 ] = b; triangles[triangleIndex + 2 ] = c; triangleIndex += 3 ; } }
2.3.3.构建Mesh 在Tile中构建Mesh逻辑如下,代码放置到TerrainTile中。根据传入的LOD级别(下一节会讲)、Tile的size,每个Tile地形一行应该有的Vertex数目,来共同构建一个TileMesh
1
2
3
4
5
6
7
8
9
10
11
12
13
14
15
16
17
18
19
20
21
22
23
24
25
26
27
28
29
30
31
32
33
34
35
36
37
38
39
40
41
42
43
44
45
46
47
48
49
50
51
52
53
54
55
56
57
58
public void SetMeshData (int curLODLevel, int tileSize, int vertexNumFix, Vector3Int terrainClusterSize this .tileSize = tileSize; float startX = tileIdxX * tileSize; float startZ = tileIdxY * tileSize; Vector3 startPoint = new Vector3(startX, 0 , startZ) + this .clusterStartPoint; tileCenterPos = startPoint + new Vector3(tileSize / 2 , 0 , tileSize / 2 ); int gridNumPerLine = tileSize / vertexNumFix; int gridSize = tileSize / gridNumPerLine; int vertexPerLine = tileSize / vertexNumFix + 1 ; int gridNumPerLineFixed = gridNumPerLine + 2 ; int vertexPerLineFixed = vertexPerLine + 2 ; LODMeshes[curLODLevel] = new MeshData(); MeshData meshData = LODMeshes[curLODLevel]; meshData.InitMeshData(gridNumPerLine, gridNumPerLineFixed, vertexPerLine, vertexPerLineFixed); int curInVertIdx = 0 ; int curOutVertIdx = -1 ; Vector3 offsetInMeshVert = new Vector3(gridSize, 0 , gridSize); for (int i = 0 ; i < vertexPerLineFixed; i++) { for (int j = 0 ; j < vertexPerLineFixed; j++) { bool isVertOutOfMesh = (i == 0 ) || (i == vertexPerLineFixed - 1 ) || (j == 0 ) || (j == vertexPerLineFixed - 1 ); Vector3 vert = new Vector3(gridSize * i, 0 , gridSize * j) + startPoint - offsetInMeshVert; vert.y = height; Vector2 uv = new Vector2(vert.x / terrainClusterSize.x, vert.z / terrainClusterSize.z); if (isVertOutOfMesh) { meshData.AddVertex(vert, uv, curOutVertIdx); meshData.SetIndiceInMap(i, j, curOutVertIdx); curOutVertIdx --; } else { meshData.AddVertex(vert, uv, curInVertIdx); meshData.SetIndiceInMap(i, j, curInVertIdx); curInVertIdx ++; } } } int curGridIdx = 0 ; for (int i = 0 ; i < gridNumPerLineFixed; i++) { for (int j = 0 ; j < gridNumPerLineFixed; j++) { int cur_w = curGridIdx % gridNumPerLineFixed; int cur_h = curGridIdx / gridNumPerLineFixed; int next_w = cur_w + 1 ; int next_h = cur_h + 1 ; int a = meshData.GetIndiceInMap(cur_w, cur_h); int b = meshData.GetIndiceInMap(cur_w, next_h); int c = meshData.GetIndiceInMap(next_w, next_h); int d = meshData.GetIndiceInMap(next_w, cur_h); meshData.AddTriangle(a, b, c, i, j); meshData.AddTriangle(a, c, d, i, j); curGridIdx++; } } meshData.RecaculateNormal(); }
2.3.4.计算法线 先前一直在强调,要记录OutOfMesh即Tile地块外部的,这一操作就是为了正确地计算法线,计算法线的代码如下:https://github.com/SebLague/Procedural-Landmass-Generation/blob/master/Proc%20Gen%20E21/Assets/Scripts/MeshGenerator.cs
1
2
3
4
5
6
7
8
9
10
11
12
13
14
15
16
17
18
19
20
21
22
23
24
25
26
27
28
29
30
31
32
33
34
35
36
public void RecaculateNormal () int triangleCount = triangles.Length / 3 ; for (int i = 0 ; i < triangleCount; i++) { int normalTriangleIndex = i * 3 ; int vertexIndexA = triangles[normalTriangleIndex]; int vertexIndexB = triangles[normalTriangleIndex + 1 ]; int vertexIndexC = triangles[normalTriangleIndex + 2 ]; Vector3 triangleNormal = SurfaceNormalFromIndices(vertexIndexA, vertexIndexB, vertexIndexC); normals[vertexIndexA] += triangleNormal; normals[vertexIndexB] += triangleNormal; normals[vertexIndexC] += triangleNormal; } int borderTriangleCount = outOfMeshTriangles.Length / 3 ; for (int i = 0 ; i < borderTriangleCount; i++) { int normalTriangleIndex = i * 3 ; int vertexIndexA = outOfMeshTriangles[normalTriangleIndex]; int vertexIndexB = outOfMeshTriangles[normalTriangleIndex + 1 ]; int vertexIndexC = outOfMeshTriangles[normalTriangleIndex + 2 ]; Vector3 triangleNormal = SurfaceNormalFromIndices(vertexIndexA, vertexIndexB, vertexIndexC); if (vertexIndexA >= 0 ) { normals[vertexIndexA] += triangleNormal; } if (vertexIndexB >= 0 ) { normals[vertexIndexB] += triangleNormal; } if (vertexIndexC >= 0 ) { normals[vertexIndexC] += triangleNormal; } } for (int i = 0 ; i < normals.Length; i++) { normals[i].Normalize(); } }
在联通了TerrainCluster与TerrainTile的执行逻辑后,通过odin编辑器或者其他途径生成每个Tile的Mesh,此处的编辑器代码暂不提供,因为关键的逻辑已经写完,如何调用这些方法都是次要的了;
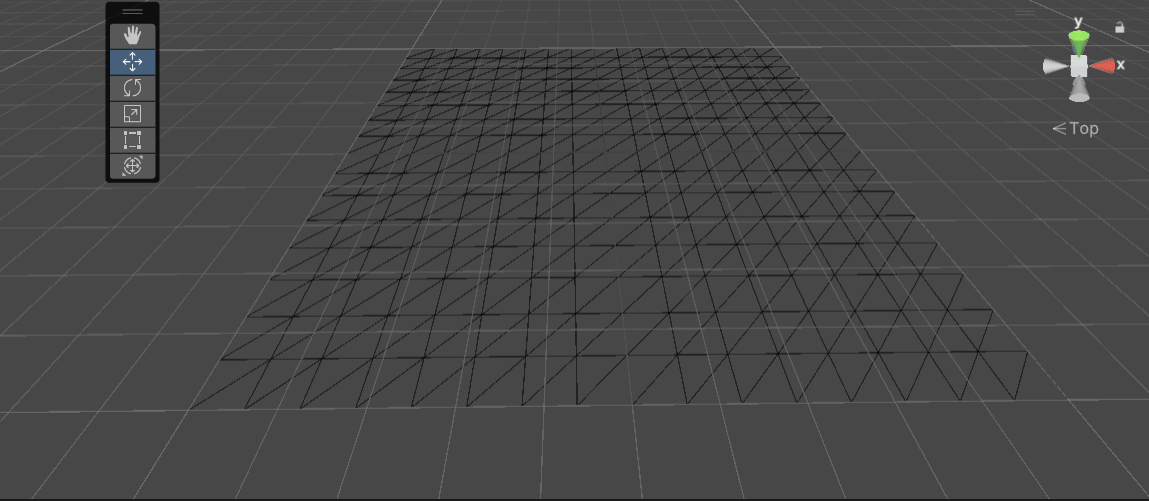
此时我们已经构建了一个基础地形,如果上述步骤全部通过,它在scene中会是这样的平面:
图:生成的地形Mesh
还远远不够!